Monday, October 29, 2012

Painting 101: How to paint a super-clean line

Originally posted at DTTD imagine.design.create

Since we moved into this house in 2001, I’ve done a LOT of painting. That’s what you do when you move into a house where practically ever room is painted pink or green ;-) Not only have I painted every room {plus a closet or two}, but almost every room has been painted at least twice {the living room a grand total of five times – UGH!}. Hubby says I keep decreasing the square footage of our house ;-)

Anyway, with all this painting under my belt, I thought I’d share some painting tips with you. Starting with…

How to paint a super-clean line between two paint colours

I picked up this tip quite a few years ago, and it hasn’t failed me yet. If you’re painting stripes or another shape on your wall, or if you want to transition between two paint colours, this is how to get a super-clean line.

LOGO outside corner taped STEP 1

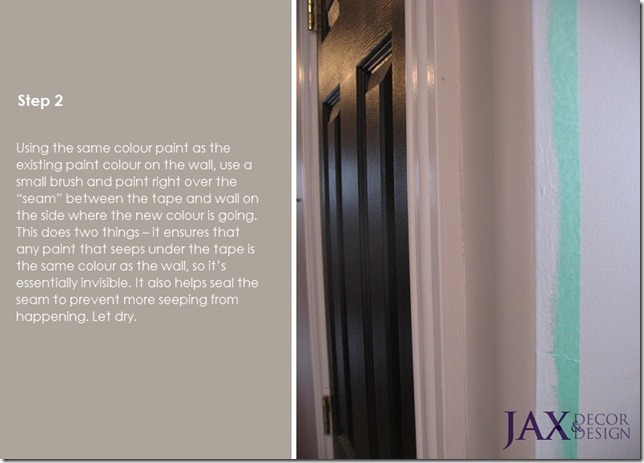
LOGO outside corner taped STEP 2

LOGO outside corner taped STEP 3

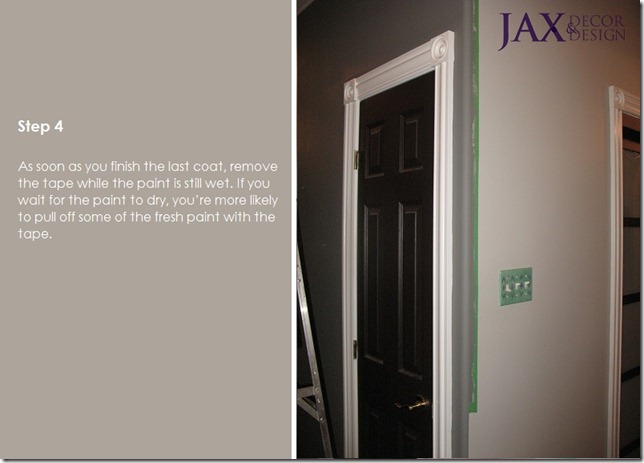
LOGO outside corner taped STEP 4

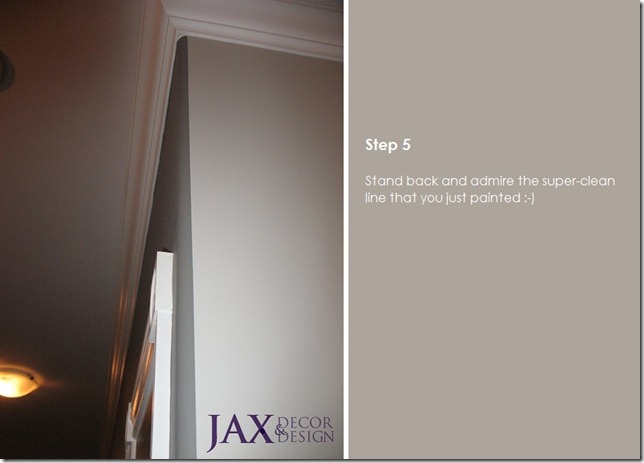
LOGO outside corner taped STEP 5

LOGO chelsea gray 4

As you can see in these pictures, I transitioned paint colours on a rounded corner. Yes, you CAN have two different wall colours even if you have rounded corners! I’ll tell you how in the next Painting 101 post.

kelly sig

Wednesday, June 20, 2012

JAXtutorial: DIY mercury glass

with candle 1Making a List, Checking It Twice :  wedding schedule Checkli

Originally posted at
DTTD imagine.design.create

DIY mercury glass is a project that’s been on my to-do list for a while… and now I can check it off, ‘cause the mercury glass is done! Woot! It was a fun and easy project – although my first attempt wasn’t as successful as I’d hoped.

There are a lot of DIY mercury glass tutorials out there that are really similar to each other, so I just picked a random one and ran with it. In a nutshell – spray five light coats of Krylon Looking Glass Paint onto the inside of a glass piece, waiting about a minute between each coat. Let dry for about 5-10 minutes after the last coat, then lightly spray a 50/50 mixture of water and vinegar onto the paint. Let sit for about 20 seconds, then rub with a damp paper towel to remove flakes of the paint, and voila, mercury glass. But my results weren’t exactly what I was hoping for… plus it took a LOT of elbow grease to rub the paint off.

star distressed  star distressed 2

So I decided to do my own thing to create the mercury glass look I was going for. I combined ideas from different tutorials, and came up with a technique that I think created a look that’s pretty close to real mercury glass…

mercury glass votive

Sorry about the lack of in-progress pictures – I was wearing gloves and getting paint all over myself and trying to go fast so I wouldn’t inhale too many fumes, so the camera just sat there watching and not actually taking pictures. But the process is easy…

What you need

  • Krylon Looking Glass Paint
  • 50/50 mixture of water and vinegar in a spray bottle
  • Glass piece with an opening large enough to fit your hand into {check out the Dollar Store}
  • Paper towels
  • Latex gloves

paint]  spray bottleglasses

How to do it

1. Lightly spray the water/vinegar mixture on the inside and outside of the glass piece, and then spray a thin coat of paint on the inside and outside of the glass piece. The instructions on the paint can say to spray it on the inside of the glass ONLY, but what can I say, I’m a rebel ;-) Painting both sides gives the piece a lot more depth. The paint is really thin and runny, so you really do have to go lightly with it. Let dry for about a minute. This is how it looks while it’s drying – not pretty, but don’t worry, it gets better!

vase in process

2. After letting dry for about a minute, put on your latex gloves and gently blot the paint & water with a paper towel. Blot, don’t rub – blotting will give you a mottled texture, rubbing will give you streaks. You won’t have much coverage at this point, but that’s OK – you want to build up layers of paint gradually.

vase close

3. Now it’s up to you to decide how much coverage you want. Keep spraying on light coats of the water/vinegar mixture and the paint, letting dry for about a minute after each application and then blotting with a paper towel until you achieve the look that you’re going for. Hold the glass piece up to a light to see how much coverage you have. I did the spraying/blotting process about six times to get the coverage that I wanted.

with candle 4

4. Once the coverage looks good to you, let the piece dry. You can still mottle the paint if you find there are spots where the paint is too solid. Wet a paper towel with vinegar and gently rub the spot in a circular motion. The paint will flake off – go slowly and don’t rub too hard, you don't want to rub all the paint off!

vae close d60

And just because I like to be different, I thought I’d try making a coloured mercury glass votive holder. I have lots of dye re-inker left over from the glitter balls I made for Christmas, so I used that. I squeezed in enough dye to cover the inside of the votive holder. It was pretty thick and didn’t swoosh around too well, so I spread it around with a paper towel and let it dry for about half an hour. Maybe I should have waited longer, but I was anxious to see if this was going to work :-) Then I followed the same process I used to create the mercury glass. Some more dye came off when I blotted, but there was enough left on the glass to give it a purple hue.

purple 2

votive d60Those are the coloured glass bottles in the background. Easy to make – pour in some paint, add a bit of water to make it thin enough to swoosh around inside the bottle, swoosh till the inside of bottle is covered with paint, turn upside to drain & dry, done!

three 1

three 2

votive close d60

with candle 7

And that’s how easy it is to create your own mercury glass :-) I’d love to create some more pieces, but my lungs need a break from the fumes! It would be better to do this project outside if you can, or at the least in a room with lots of good ventilation.

So what do you think – are you going to take a shot at making your own mercury glass?

kelly sig

Tuesday, June 12, 2012

JAXtutorial: DIY chapiz chandelier

Originally posted at DTTD imagine.design.create
Have you seen the awesome DIY capiz chandeliers out there in the blogosphere? Here are just a few that inspired me to make my own – and yes, believe it or not, they’re all FAUX capiz. {Click the images to read about how each one was made.}


Lisa Roy Muskoka |A Happy Place Called Home |SZInteriors
I’ve already hung chandeliers pretty much everywhere in the house that a chandelier can go. Ahhhh, but wait! What about this spot in the hallway outside the bedrooms…
DSC_0375
I have a couple of old brass chandeliers that I tried to give to Habitat for Humanity’s ReStore, but they didn’t want them. Can you believe it?! Who wouldn’t be all over this brass & plastic beauty ;-)
old chandy 1[12]
I can’t find a before picture of the chandelier I used, but it’s the same as this one except tiered as opposed to spiraled. But the the tiers were opposite from the direction I needed them to go, plus it was too big. So hubby worked a little magic on it and changed it from too big and upside down to just right.
before 1
done
Now the fun part – making the faux capiz shells. The first thing you need to do is Iron three sheets of wax paper together. Over and over and over. You’ll need a LOT of wax paper! Put parchment paper on top of the wax paper before you iron so the iron doesn’t stick to it.
wax paper pile
I crumpled and then flattened out some sheets of wax paper to add texture to my “shells”. I randomly combined crumpled and uncrumpled sheets in each set of three.
crumpled
Texture!
crumpled texture
Use a circle cutter to cut out your circles. I bought a 1-1/2” Fiskars punch at Michaels. Fold your wax paper like an accordion and punch out the circles in double-thicknesses. This will make things twice as fast, plus the cutter doesn’t cut very well through just one layer. I recommend doing this step front of the TV while watching March Madness :-)
watching bball
You need a LOT of wax circles…
circles 1
Once your circles are cut, it’s time to attach them together. My original plan was to use jumper rings, but after linking one batch with rings, I realized this method would take me about seven years. Plus my thumb & finger were really not happy with me opening and closing all those rings. {Check out A Happy Place Called Home to see the jumper ring method done right.}
jumper rings on circles
So I switched over to the sewing method – WAAAAYYY faster and easier. {Check out Lisa Roy Muskoka for an easy-to-follow tutorial with lots of pics.} Sew long chains of circles together, and then cut them to the lengths that you want.

Image via Lisa Roy Muskoka
Mine ranged from 7 circles per chain for the outer top tier, 10 circles per chain for the lowest tier, and 20-22 circles per chain everywhere else. In the end, the circles on the lowest tier don’t actually show, but they help give the chandelier a fuller look.
Hubby installed the chandelier – remember to put in the bulbs before you put on the chains!
naked chandelier 2{Note: funcolors asked about the potential fire hazard of the wax paper with the light bulbs. We’re using 40W bulbs, and even after having the light on for quite a few hours straight, there was no issue with the wax getting hot. Although that being said, I wouldn’t leave the light on for a prolonged amount of time with nobody home, just to be safe.}
And then I hung the chains on it. I don’t have pictures of this part, because, well, I forgot to take pictures. Plus I didn’t hang them in the most logical order, so you don’t want to hang yours the way I hung mine. You want to start with the lowest tier and then move up. Also, after I hung all the chains, I took them all down when I realized that it would be better to wrap wire around each tier and hang the chains over the wire instead of over the brass arms. This way, the flat side would be pointing out instead of sideways.
wire
And this is how it turned out…
against gallery wall
My top outer tier is all the same length, and the rest of the chains are hung at slightly different lengths because I didn’t want the bottom to be perfectly straight.
close on
from bedroom
towards kitchen
with staircase on
Even close up, the wax paper really does look like capiz shells.
close
close on 2
I still may do a little bit of tweaking to the top tier to make it fuller around the top. Just have to figure out how…
Here’s a breakdown of the supplies and costs:
  • Chandelier base – already had it, $0.00
  • Wax paper – already had a mega roll, bought 1 roll at the Dollar Store, $1.00
  • Jumper rings – 1 pack at Michaels, ~$3.00 with coupon {better to sew circles together}
  • 1-1/2” circle cutter – $21.99 + 40% off coupon at Michaels, ~$14.00
  • Spool of wire – $2.00
  • Thread & sewing machine
TOTAL COST: $20.00
Yep, that’s right – just 20 smackers for what’s essentially a brand new chandelier. Not too shabby, eh? :-) So what do you think – will you be making your own capiz chandelier?
kelly sig
Linking up to…

five days five ways  feature friday free for all